Buy me a cup of coffee
A ridiculous amount of coffee was consumed in the process of building this project. Add some fuel if you'd like to keep me going!
Along our patio and through much of the back yard there was once a beautiful garden that was loved dearly. This was in the 1980s when the house was built. As time went on the home passed through several owners and rented out. The last 10-15 years have not kind to it. Invasive plants like Himalayan Blackberry and Invasive Pea plants took over the hill. Young cedar and fir saplings were let grow into a thick mess.
As this overgrowth has been hacked through, I’ve been keeping the (more or less) straight young trees to be used as logs on the railroad. Two years ago when I started work on the railroad I assembled a small log retaining wall using cedar cut and shaped into small logs. No glue was used, instead the logs were laid between short piles, cut from additional cedar and inserted into the soil keeping the larger logs forming the wall in a row.

Last year after I finished the sprinkler adjustments in the garden bed I began planning the leveling of the beds and finishing up the siding through that area. Since the track and sub-roadbed stood nearly 3″ above the garden bed, a retaining wall was the natural choice. Early this Spring I began filling the garden bed and shoring up the track. Over the course of a year I cut a hay bale sized pile of young cedar and fir. The success of the test wall I built previously prompted me to begin construction of further retaining walls along the siding.
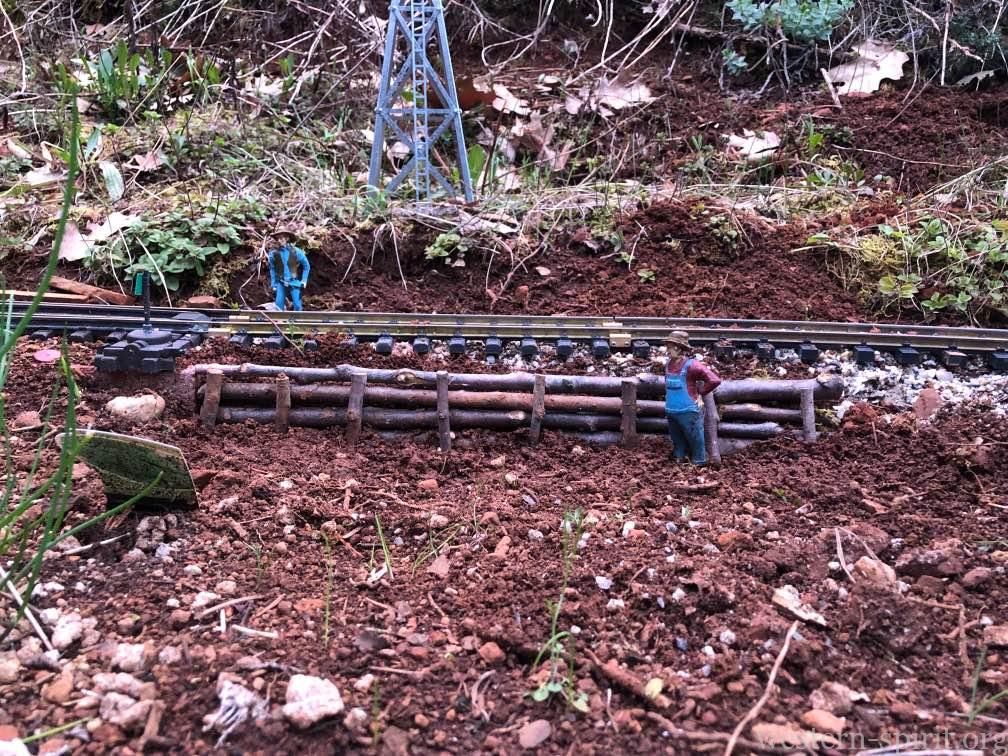
To make my “logs” I stripped the young trees of branches, keeping the thicker branches that might be of use. This was done with standard pruning shears. Care was made to get as close cut as possible so the logs would be as smooth as possible. The first new section used short logs forming a square retaining wall around the switch stand. I measured the length for each log and cut it with shears. The ends were then roughed up with a garden knife to give them a hewn look. Logs were notched to hold the next row with my knife and backfill of small rocks and dirt was laid as each row was built up. I thought this looked pretty good and took a break for lunch.
When I began work on the next wall segment I began by reseating the brick sub-roadbed and leveling it. I then realized I forgot to do this for the switch where I had built the short wall before lunch. Once I leveled that brick the short wall had to be removed and I started on a larger replacement to face the brick edge. This time I used logs 10″ long with a little rock fill between the older adjacent wall. This new wall ended a few inches from the edge of the brick and the logs at the corner had to be cut to short lengths.


Next I began working on a section of wall that was 18″ long. At first this was not an issue, but it became apparent that I didn’t have enough straight stock to work with. This segment hid the end of the large brick under the switch and the regular brick under the siding. The end logs I laid just after the end of the brick and realized I could use longer cross logs that could be buried under the track and make a stronger wall. After this segment, I began cutting the logs to be 2″ longer than the brick, allowing me to continue this construction along the siding.
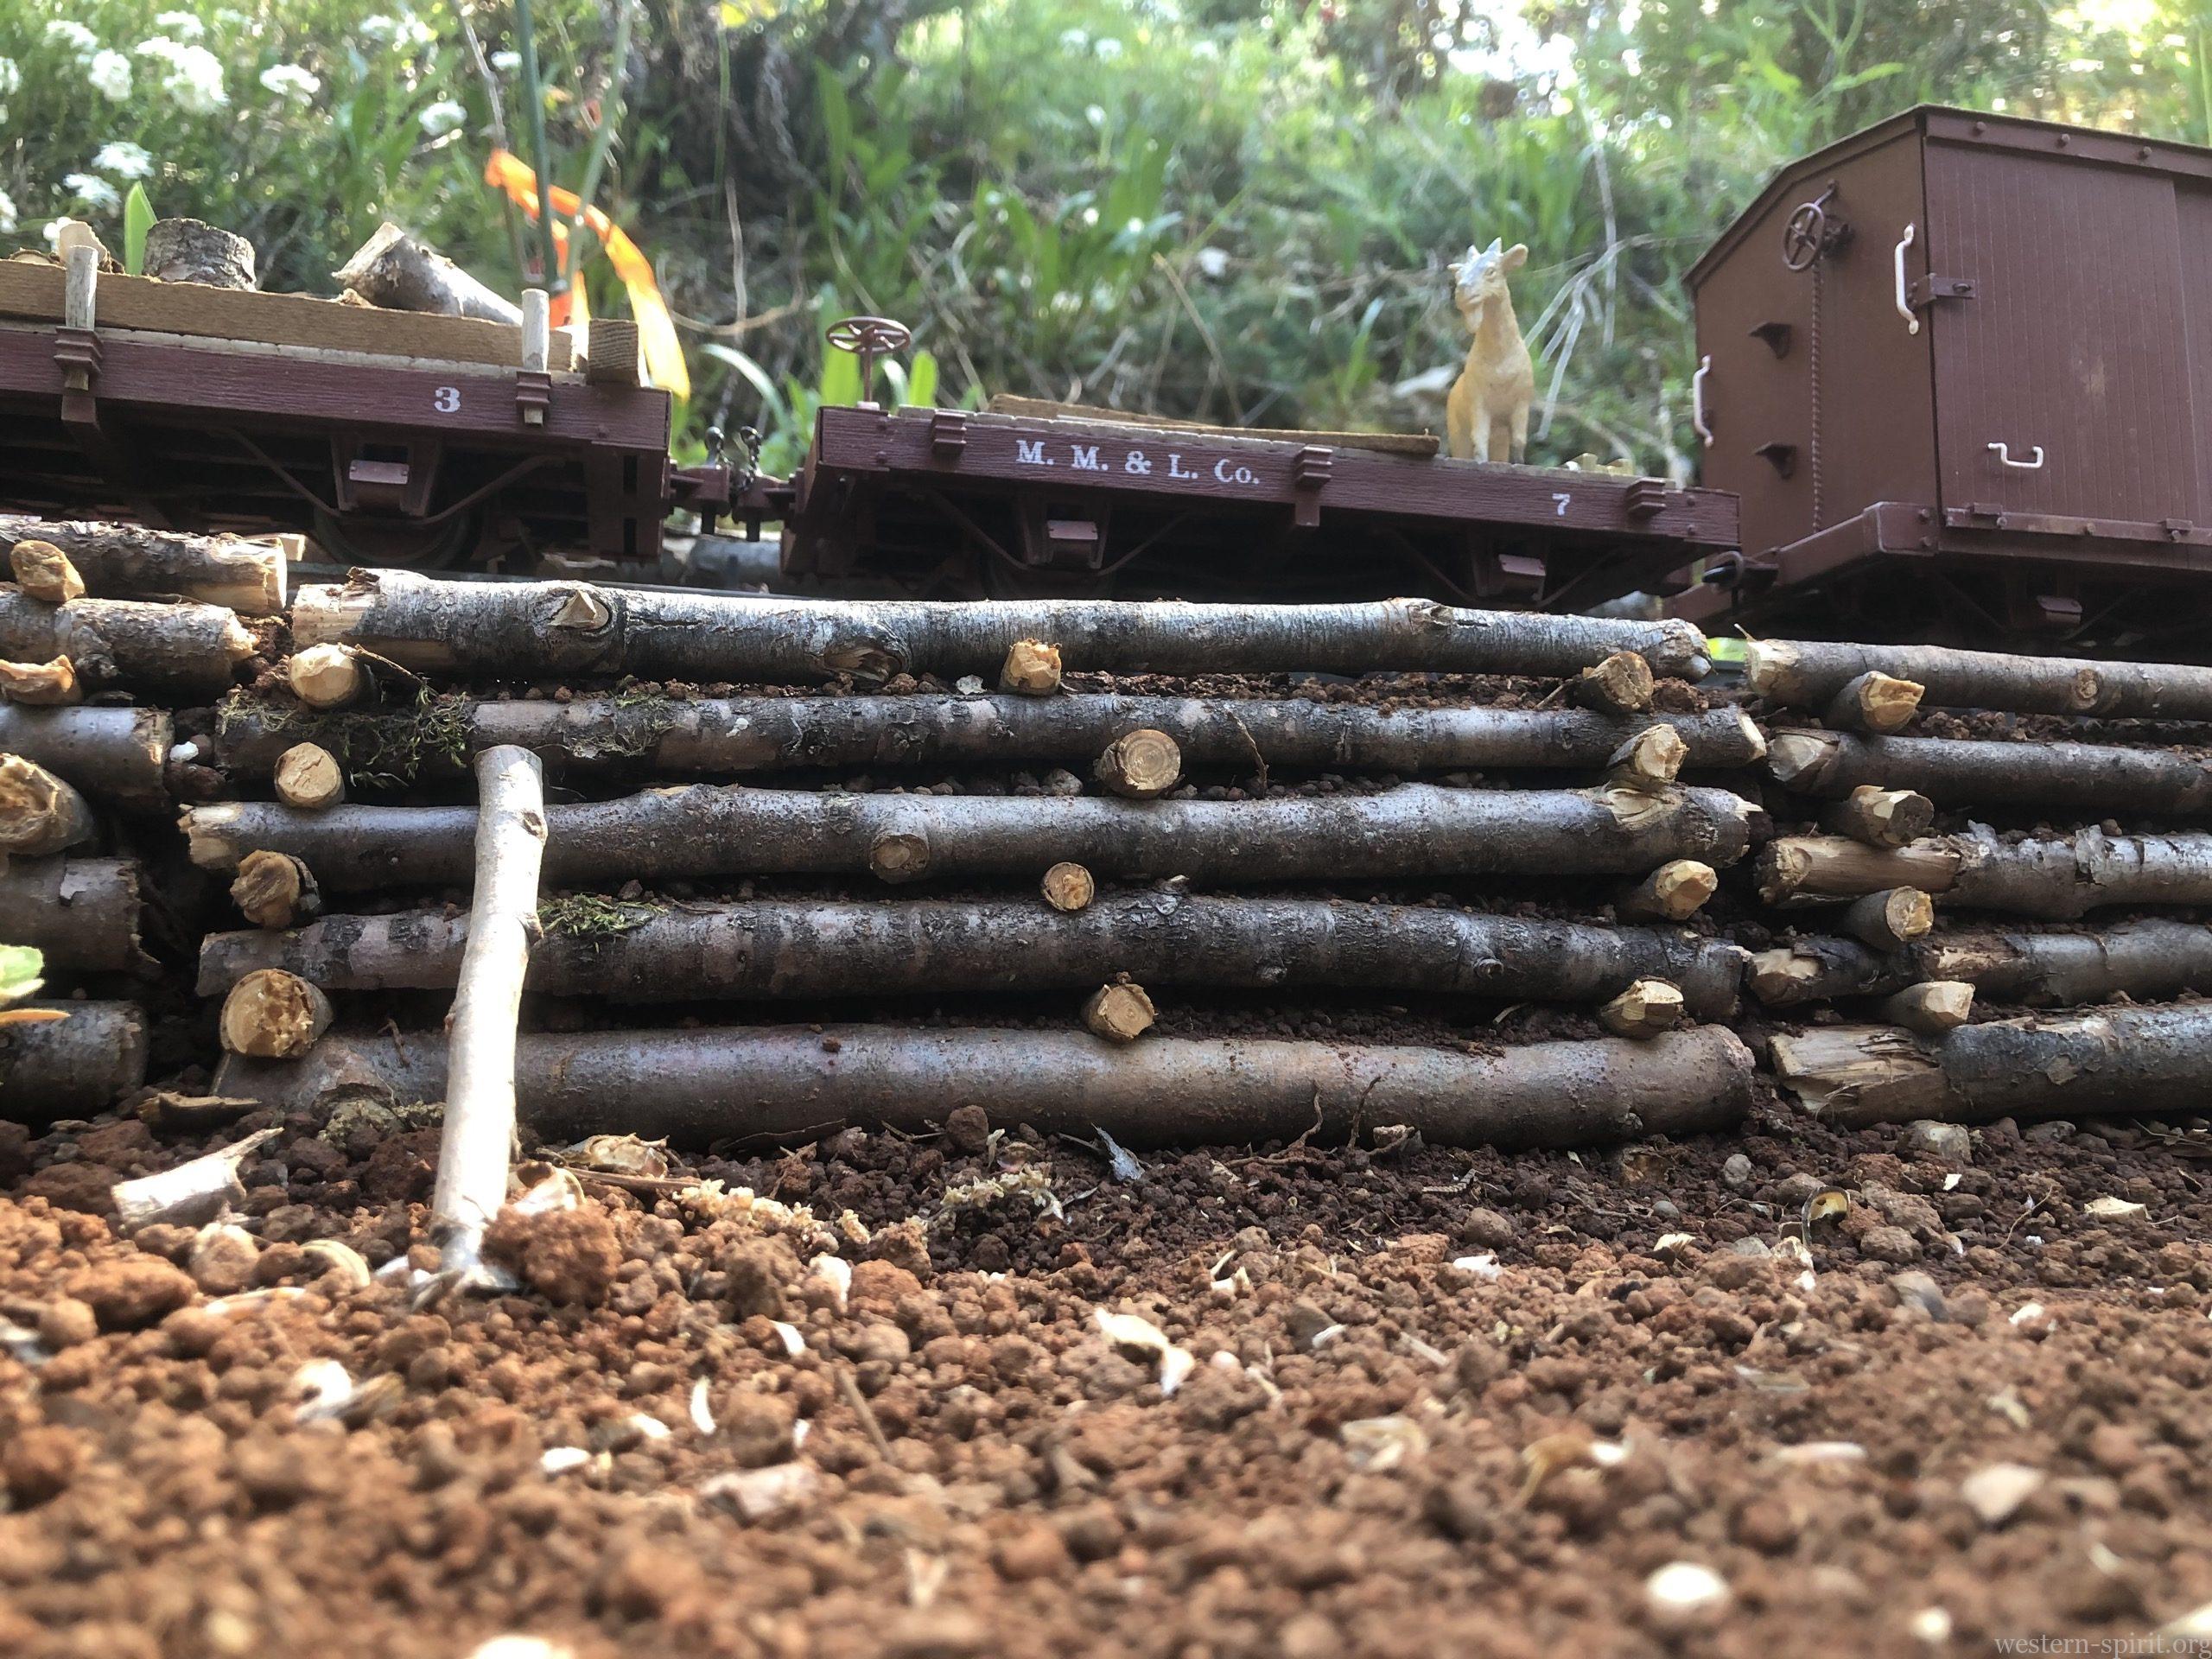
I patterned the cribbing on a U.S. Forest Service’s diagram I found online. Since I don’t have to worry about supporting a full sized railroad or human, the construction process was simplified to only utilize face logs and filler logs with no rear logs. The sill logs are inset to the width of the brick, cut long enough so the brick rests on them keeping the rest of the wall sloped toward the track. I also used less filler logs between the sills, but spreading them as evenly as possible.
Construction of the wall took most of the week. One morning I completed 4 feet of wall before running out of pre-trimmed cedar. It became clear that I was running low on larger diameter cedar but a trip around the property turned up enough to complete the project. The completed wall is nearly 8 feet long and there is a further extension to build when the short curved trestle on the mainline is constructed. I still need to finish laying ballast under the track but for now I want the wall and dirt to get compacted through the summer.
I am quite pleased the results. The wall adds a lot of character to photographs of equipment sitting idle in the garden.

Start the discussion